Otomax
http://forum.djawir.com/server-pulsa-elektronik-118/software-otomax-gratissss-26671/
YOI BOS... nih linknya ada 5 item yang di download dan di install terlebih dahulu
dan urutan instalnya sesuai dengan urutannya ini ya broo.....
1.LINK TEAM VIEWER
Free File Hosting & Video Downloads, Free File Sharing, Online Friends Network - Ziddu
2.WindowsInstaller-KB893803-v2-x86
Free File Hosting & Video Downloads, Free File Sharing, Online Friends Network - Ziddu
3.NetFx20SP1_x86
RapidShare: Easy Filehosting
4.SQLServer2005_SSMSEE
Free File Hosting & Video Downloads, Free File Sharing, Online Friends Network - Ziddu
5.SQLEXPR32
RapidShare: Easy Filehosting
http://forum.djawir.com/promotion-sales-trading-66/otomax-software-pulsa-terbaru-running-di-net-dan-sql-server-2005-mau-mau-mau-26276/
PPOB:
http://forum.djawir.com/server-pulsa-elektronik-118/cara-usaha-ppob-57443/
http://forum.djawir.com/server-pulsa-elektronik-118/trik-ngkalin-chip-m-kios-66103/index2.html
http://forum.djawir.com/server-pulsa-elektronik-118/yang-punya-chip-sev-mkios-xl-dll-region-di-sini-ya-66421/index3.html
http://forum.djawir.com/server-pulsa-elektronik-118/kumpulan-software-server-pulsa-gratis-dan-demo-38944/
http://forum.djawir.com/server-pulsa-elektronik-118/

Wednesday 31 March 2010
Monday 8 March 2010
Science Project
http://sciencemadesimple.com/
http://www.education.com/
Lagu Relaksasi
http://www.kaskus.us/showthread.php?t=3551890
Bila Flash Disk terbaca tapi gak muncul di explorer
Mungkin Drive Letter Flashdisk bro kedobel dengan Drive Letter Hardisk.
Contohnya : partisi hardisk sampai drive F, dan karena flashdisk Drive Letternya juga F maka gak terlihat di My Computer.
Cara mengatasinya : Ganti Drive Letter flashdisk bro.
Langkahnya :
1. Colokin Flashdisk
2. Klik Kanan My Computer di desktop
3. Pilih Manage
4. Pada bagian Storage, pilih Disk management
5. Pada kolom kanan bawah terdapat list semua drive komputer bro
6. Scroll, cari drive Flashdisk milik bro (bisa lihat kapasitasnya, lebih kecil dari hardisk)
7. Klik Kanan, pilih Change Drive Letter & Path
8. Pilih Change, pilih Drive Letter yang belum digunakan (contoh : H)
9. Pilih OK, selesai
Jika berhasil, di My Computer, flashdisk akan terbaca sebagai drive H.
Mudah mudahan membantu.
Selebihnya di :
http://www.kaskus.us/showthread.php?t=1195441
http://www.kaskus.us/showthread.php?t=1195441
Blokir copy data dari komputer ke flashdisk atau usbdisk
Cara mengamankan data dikomputer anda supaya tidak bisa dicopy ke flashdisk lakukan langkah sebagai berikut
1. open REGEDIT
2. HKEY_LOCALMACHINE\SYSTEM\CurrentControlSet\Control
3. Di folder CONTROL, ketik -> Edit>New>Key
folder baru tersebut beri nama —-> “StorageDevicePolicies”
4. “StorageDevicePolicies”, ketik Edit>New>Dword (32-bit)
5. key yang baru beri nama : “WriteProtect”
6. Klik 2x Key WriteProtect-nya, lalu ganti Value Data jadi 1
7. Restart
Untuk membuka proteksi agar data bisa dicopy ke flashdisk dengan mengganti value di key write protect menjadi 1.
Bagaimana membuka Flash Disk yang Terkena Write Protected : .........
Masalah ini muncul karena flash disk langsung dicabut tanpa "savely removed hardware". Untuk mengatasinya ada beberapa cara, yang bisa berhasil untuk masing2 kasus (tidak untuk setiap kasus). Gak ada salahnya untuk mencoba :
Cara 1.
- Start > Run > type ‘regedit’ then hit 'OK'.
- Browse to the following key:
My Computer\HKEY_LOCAL_MACHINE\SYSTEM\CurrentControlS et\Control\StorageDevicePolicies
- Double click on the string ‘WriteProtect’ and change the ‘Value Data’ box to ‘0’
- You may also need to do this for the strings in any folders called ‘ControlSet***’ e.g.
My Computer\HKEY_LOCAL_MACHINE\SYSTEM\ControlSet001\C ontrol\StorageDevicePolicies
Cara 2.
I am running Windows XP Service Pack 2, so this description applies only in that environment.
Centon's tech support suggested doing the following...
Start->Settings->Control Panel
Administrative Tools
Computer Management
Under Storage in the left panel, click on Disk Management, wait a minute for Windows to do whatever it is doing,......
Locate the data stick/thumb drive/whatever-you-want-to-call it, in the right top windowand click on it.
Right click
in the popup, click on "Delete Partition" -- make darn sure you are doing this to the RIGHT drive!!!!!
Right click again, and choose "Create Partition" (or was it format, I forget maybe it was both).
Cara 3.
Pakai Rapair Utility dari si pembuat flashdisk. Dibawah ini ada link dari HP dan apacer yang banyak dipakai dan berhasil juga untuk berbagai merk.
Di sini :
Apacer = Handy Steno 2.0 Repair Tool
HP = HP Tools
Cara 4.
Perbaiki melalui Linux.. Tutorial langkah2 bisa dibaca disini (maaf panjang banget soalnya). dan mungkin membutuhkan pemahaman tentang perintah2 linux.
Link : linux-tip-resurrecting-broken-usb
Cara 5.
Pakai application OnBelay, disini : Powerful solution for Data Backup, Data Recovery & Formatting for Flash Media
---------------------------------
UPDATE LAGI....
Lah...kok tiba2 kapasitas flash disk jadi menngecil...sisanya kemana? ......
Asal bukan kasus penipuan flash disk dari china yang memang sebenarnya berkapasitas kecil tapi disulap seakan berkapasitas besar, cara2 dibawah bisa ditempuh kalau tiba2 flash disk anda mengalami corrupt pada kapasitas.
Disini ada beberapa pilihan free program:
Smart Data Recovery: http://tiny*url.com/2kcsmm
SoftPerfect File Recovery: http://tiny*url.com/jcacz
ADRC Data Recovery Software Tools: http://tiny*url.com/ppdn9
Dibawah ini ada beberapa program extensive shareware yang mempunyai free trial versions:
Pen Drive Data Doctor Recovery: http://tiny*url.com/2yak98
BadCopy Pro: http://tiny*url.com/ynsv8n
Key Drive Recovery Tool: http://tiny*url.com/2s6x24
Data Recovery 4 Pen Drive: http://tiny*url.com/39t2vx
-----------------------------------------
Update 12 Jan 2009
Driver USB2.0 untuk Windows98
Windows 98 tidak mempunyai driver untuk removable drives seperti flash disk atau external HDD. Kalau di waktu dulu beberapa vendor flash disk masih menyertakan driver untuk produk mereka, tapi di masa sekarang hampir tidak ada yang menyediakan driver ini. Dibawah ini disediakan satu driver yang kompatible untuk semua external drives.
Sebelumnya cek dulu, versi dari windows 98 :
- Klik kanan My Computer dan pilih Properties
- Di halaman System Properties page, kilik General tab
- Di Under the System heading, look for the version number (see right)
Version 4.10.1998 adalah the original/first edition Windows 98 (98FE)
Version 4.10.2222 adalah Windows 98 Second Edition (98SE)

Download program ini :
- Windows98 FE : nusb320-Eng-98FE.exe
- Windows98 SE : nusb33e.exe
Cara instalasi untuk Windows 98SE :
Download file exe file ke desktop
Hapus semua driver untuk USB flash drives di Device Manager
Hapus semua driver USB 2.0 controllers
Hapus semua unknown devices dari Device Manager
Jalankan file exe yg kita sudah download, ikuti perintah, rebootsetelah instalasi
Ketika komputer sudah di boot lagi, akan mendeteksi USB 2.0 controllers baru, dimana kita mungkin harus reboot lagi.
Selesai.
Sumber : di sini
----------------------------------------------------------------
Update 28/01/2009
USB Autorun Virus Remover
Autorun Virus Remover menyediakan perlindungan terhadap malicious programs yang mencoba menyerang melalui USB drive. Saat USB device dimasukkan ke komputermu, Autorun Virus Remover akan secara otomatis men-scan, mem-block dan menghapus autorun virus, trojans, dan code yg membahayakan. Juga,akan mendeteksidan menhapus virus USB seperti virus autorun.inf di komputermu.
Sekarang kamu akan lebih terjamin akan kekebalan terhadap pen drive nakal, dimana menjadi sumber terbesar akan virus/trojan horses/worms.
Download Link : http://www.mediafire.com/?jdg0z0mhyzw
Sumber : di sini
---------------------------------------------------------------
Update 29-01-2009


eBoostr™ is an alternative solution to Vista’s ReadyBoost and SuperFetch technologies now available on Windows XP
It speeds up your PC and improves application responsiveness by using flash memory and free RAM as an extra layer of performance-boosting cache for your PC. Use up to four inexpensive flash devices to speed up your system. Add more speed to your PC without any hardware upgrade!
Download link dari bro Vivec : di sini ato di sini juga
Trims..bro Vivec...
Sumber : di sini
Cara Men-Disable Autorun CD dan Removable Disk
Removable disk menjadi media tempat menyebarkan virus setelah flooppy disk tidak populer lagi. Virus virus lokal memanfaatkan flashdisk dan memory card untuk menyebar dan menginfeksi komputer karena removable disk merupakan media yang populer digunakan untuk menyimpan dan pindah data.
Berhati-hatilah menggunakan flashdisk apalagi flashdisk yang tidak jelas asal usulnya sebaiknya sebelum di akses di scan dulu dengan menggunakan antivirus yang uptodate. Jika antivirus tidak memungkinkan untuk di update selalu apalagi tidak mempunyai koneksi internet tentu tidak bisa mengupdatenya.
Untuk itu bisa dengan jalan mendisable autorun CD dan Flashdisk. Virus bekerja dengan mengcopykan dirinya ke dalam flashdisk dan membuat attribute hidden sehingga tersembunyi. Untuk mengakses file virus ini dengan cara membuat subroutin pada flashdisk tersebut dengan memanfaatkan fasilitas file autorun.inf hampir sama fungsinya dengan autoexec.bat pada harddisk.
Disaat flashdisk dipasangkan di USB, system akan mencari file autorun.inf ini, jika file ditemukan system akan secara otomatis menjalankan daftar file yang terdapat pada file autorun tersebut. Autorun ini bisa kita non aktifkan dengan cara mengubah nilai yang terdapat pada registry. Caranya sebebagai berikut:
WINDOWS 95/98/ME
1. Access the System Properties Dialog. Using Control Panel: My Computer: Properties or Explorer: My Computer: Properties.
2. Select the Device Manager tab.
3. Select the CD-ROM folder.
4. Select the entry for your CD-ROM drive.
5. Select Properties.
6. Select the Settings tab.
7. Turn on or off the Auto insert notification option.
8. Select OK.
9. Select OK
WINDOWS NT/2000
1. Start RegEdit (regedt32.exe).
2. Go to HKEY_LOCAL_MACHINE/System/CurrentControlSet/Services/Cdrom.
3. Edit the Autorun value to ‘1′ to enable autorn, and ‘0′ to disable autorun.
4. Close RegEdit
WINDOWS XP
1. Open Windows Explorer by pressing the Windows + “e” key.
2. Right-click the desired CD-ROM and select Properties from the menu.
3. Select the AutoPlay tab.
4. Select each item from the pulldown list and for the Action to perform, select “Take no action” to disable autorun, or pick the apporpriate action to take if enabling autorun.
5. Select OK.
REMOVABLE MEDIA (FLASHDISK ETC)
Autorun can be enabled or disabled for all Removable media types, such as a floppy or Zip disk. Windows systems are configured to enable CD Notification, other removable media are by default disabled.
The System Properties User interface only exposes the CD Enable or Disable selection. The setting reflected in this dialog makes an entry in the System Registry. It is in this same location that other media types are configured.
Notes:
1. Modifiying the Registry is not for the inexperienced user. Anyone will tell you, be VERY careful.
2. The modifications made in this case use Hex not Decimal numbers. If you are unfamiliar with the Registry or the characteristics of base numbering and Hex, studying these topics prior to making these modifications is advisable.
To Modify these Registry Settings, Use Regedit and navigate to the following Key:
HKEY_CURRENT_USER
Software
Microsoft
Windows
CurrentVersion
Policies
Explorer
“NoDriveTypeAutoRun”
The default value for the setting is 95. Change the first byte to 91. Restart the computer to make the new setting take effect. You may have to right-click on the floppy and choose AutoPlay from the menu to see the AutoPlay behavior.
Sumber : di sini
Mempartisi Flash Disk
Ingin mempunyai 2 flash disk tapi ga kesampean ??? Satu - satunya solusi adalah dengan cara Partisi, tapi flashdisk dipartisi, memang bisa ? Setau kita selama ini kan hanya Hardisk yang dapat dipartisi, ya...Sekarang saatnya merubah tanggapan itu....Beginilah caranya..
Pertama-tama siapkan terlebih dahulu alatnya...
1. Partition Magic
2. HP Key Boot Utility
3. Data Pentingnya
Pertama download terlebh dahulu semua data - datanya
Extract FD partition.zip terlebih dahulu....Setelah itu masuk ke dalam registry caranya, seperti biasa : Start >> Run ketik regedit kalau sudah terbuka jendela registrynya masuk ke dalam key berikut :
HKEY_LOCAL_MACHINE\system\controlset001\Enum\UsbSt or
Ya, pada key tersebut akan banyak nama - nama product flashdisk yang pernah masuk ke komputer anda, untuk mengetahuinya sama atau tidak dengan flashdisk anda ada baiknya kita melakukan ricek, caranya :
Klik kanan icon usb di system tray alias pojok kiri bawah pilih Sadely remove Hardware, Kemudian pilih USb yang mau anda belah dan sekarang Klik 2x pada icon tersebut, sesuaikan pada Keyname di registry tadi (HKEY_LOCAL_MACHINE\system\controlset001\Enum\UsbS tor)
Copy KeyName pada registry tersebut (HKEY_LOCAL_MACHINE\system\controlset001\Enum\UsbS tor) misal: Disk&Ven_Kingston&Prod_DataTraveler_2.0&Rev_PMAP
Ya, apabila sudah benar seperti diatas, sekarang buka file cfadisk.inf kemudian tekan Ctrl + H, dan ketikkan Dan Replace Namenya adalah keyname pada registry tadi, yupz sekarang tekan Replace All. Setelah itu masuk ke my computer >> [klik kanan pada FD yang mau dipartisi] pilih; Properties >> Pilih Hardware dan pilih FD yang mau anda belah =p dan klik tombol Properties || Masuk ke tab Driver || Setelah itu pilih Update Driver ||, Kalo sudah, ada di Hardware Update Wizrd, pilih Install From a List [ yang bawah ] Next || Pilih Don't Search I will ...[yang bawah] || Next lagi || Klik Have Disk || Browse dimana cfadisk.inf diletakkan,sekarang pilih next || Next, sampai Finish...
Jika benar maka Flashdisk anda akan berganti status menjadi Hardisk, Sekarang Install semua Software yang anda Download tadi, Sekarang gunakan HP Key Boot Utility untuk memperbaiki bad sectornya untuk penggunaan key boot utility sampai Proses pembelahan flashdisk anda dapat melihat tutorial saya di sini ya, ini memang tutorial saya untuk di dua tempat untuk itu saya izin terlebih dahulu =p yah....
Demikianlah tutorialnya, semgoa anda jadi lebih bisa berhemat =p untuk tidak membeli 2 FlashDisk
NB : Hati - hati terhadap DeepFreeze Ingat status FD anda sekarang adalah Hardisk, apabila anda ingin mengembalikannya menjadi status FD anda cukup pdate Driver lagi, tetapi Pilih yang Install Software Application [Recomended]
Sumber : di sini
nambahin yh bos buat matiin autorun XP..
1.RUN
2.GPEDIT.MSC
3a.Computer Configuration\Administrative Templates\System
3b.User Configuration\Administrative Templates\System
4.double click Turn off Autoplay ganti enabled All Drives
5.restart
Memperbaiki Flash Disk Yang Rusak
Author: Agus Waluyo
Awalnya saya bingung juga kenapa Flash Disk Kingstoon saya yang 1 Gb mendadak rusak. Kalau ditancapkan terdeteksi tetapi kalau di akses selalu ada tulisan Please Insert Disk. Sedangkan jika dilihat propertiesnya terbaca 0 kb. Flashdisk yang saya beli setahun lalu seharga Rp 180.000,00 itu (mungkin kalau sekarang sudah bisa dapat dua ya ) nampaknya akan saya bongkar dan akan saya gunakan untuk pembelajaran anak-anak.
Hanya sekedar iseng saja, karena saya juga tidak yakin kalau flashdisk itu bisa diperbaiki aku masukkan kata kunci “memperbaiki flashdisk rusak”. Hanya dalam hitungan detik saya dihubungkan dengan sistus Mas TIkno, dengan setengah hati saya baca tutorialnya. Setelah download file sebesar 45 Mb dan mengikuti step-step yang ada, wah surprise ternyata flash disk saya bisa lagi, sayapun tidak menyangka.
Untuk meperbaikinya silahkan ikuti step-step berikut ini.
1. Download HP Drive Boot Utility sebesar 45 Mb. Freeware. Software ini mendukung untuk Flash Disk yang bukan keluaran HP.
2. Install software tersebut
3. Tancapkan flashdisk yang bermasalah ke dalam komputer.
4. Jalankan software dan pilihlah drive tempat flash disk anda.
5. Pilih Creae New or Replace Existing Configuration
Sekarang coba cek flash disk anda. Wah sekarang punya flashdisk lagi dong
1. Download HP Drive Boot Utility sebesar 45 Mb. Freeware. Software ini mendukung untuk Flash Disk yang bukan keluaran HP.
2. Install software tersebut
3. Tancapkan flashdisk yang bermasalah ke dalam komputer.
4. Jalankan software dan pilihlah drive tempat flash disk anda.
5. Pilih Create New or Replace Existing Configuration
Sekarang selamat mencoba semoga sukses..
>>>Download softwarenya disini gan<<<
http://sciencemadesimple.com/
http://www.education.com/
Lagu Relaksasi
http://www.kaskus.us/showthread.php?t=3551890
Bila Flash Disk terbaca tapi gak muncul di explorer
Mungkin Drive Letter Flashdisk bro kedobel dengan Drive Letter Hardisk.
Contohnya : partisi hardisk sampai drive F, dan karena flashdisk Drive Letternya juga F maka gak terlihat di My Computer.
Cara mengatasinya : Ganti Drive Letter flashdisk bro.
Langkahnya :
1. Colokin Flashdisk
2. Klik Kanan My Computer di desktop
3. Pilih Manage
4. Pada bagian Storage, pilih Disk management
5. Pada kolom kanan bawah terdapat list semua drive komputer bro
6. Scroll, cari drive Flashdisk milik bro (bisa lihat kapasitasnya, lebih kecil dari hardisk)
7. Klik Kanan, pilih Change Drive Letter & Path
8. Pilih Change, pilih Drive Letter yang belum digunakan (contoh : H)
9. Pilih OK, selesai
Jika berhasil, di My Computer, flashdisk akan terbaca sebagai drive H.
Mudah mudahan membantu.
Selebihnya di :
http://www.kaskus.us/showthread.php?t=1195441
http://www.kaskus.us/showthread.php?t=1195441
Blokir copy data dari komputer ke flashdisk atau usbdisk
Cara mengamankan data dikomputer anda supaya tidak bisa dicopy ke flashdisk lakukan langkah sebagai berikut
1. open REGEDIT
2. HKEY_LOCALMACHINE\SYSTEM\CurrentControlSet\Control
3. Di folder CONTROL, ketik -> Edit>New>Key
folder baru tersebut beri nama —-> “StorageDevicePolicies”
4. “StorageDevicePolicies”, ketik Edit>New>Dword (32-bit)
5. key yang baru beri nama : “WriteProtect”
6. Klik 2x Key WriteProtect-nya, lalu ganti Value Data jadi 1
7. Restart
Untuk membuka proteksi agar data bisa dicopy ke flashdisk dengan mengganti value di key write protect menjadi 1.
Bagaimana membuka Flash Disk yang Terkena Write Protected : .........
Masalah ini muncul karena flash disk langsung dicabut tanpa "savely removed hardware". Untuk mengatasinya ada beberapa cara, yang bisa berhasil untuk masing2 kasus (tidak untuk setiap kasus). Gak ada salahnya untuk mencoba :
Cara 1.
- Start > Run > type ‘regedit’ then hit 'OK'.
- Browse to the following key:
My Computer\HKEY_LOCAL_MACHINE\SYSTEM\CurrentControlS et\Control\StorageDevicePolicies
- Double click on the string ‘WriteProtect’ and change the ‘Value Data’ box to ‘0’
- You may also need to do this for the strings in any folders called ‘ControlSet***’ e.g.
My Computer\HKEY_LOCAL_MACHINE\SYSTEM\ControlSet001\C ontrol\StorageDevicePolicies
Cara 2.
I am running Windows XP Service Pack 2, so this description applies only in that environment.
Centon's tech support suggested doing the following...
Start->Settings->Control Panel
Administrative Tools
Computer Management
Under Storage in the left panel, click on Disk Management, wait a minute for Windows to do whatever it is doing,......
Locate the data stick/thumb drive/whatever-you-want-to-call it, in the right top windowand click on it.
Right click
in the popup, click on "Delete Partition" -- make darn sure you are doing this to the RIGHT drive!!!!!
Right click again, and choose "Create Partition" (or was it format, I forget maybe it was both).
Cara 3.
Pakai Rapair Utility dari si pembuat flashdisk. Dibawah ini ada link dari HP dan apacer yang banyak dipakai dan berhasil juga untuk berbagai merk.
Di sini :
Apacer = Handy Steno 2.0 Repair Tool
HP = HP Tools
Cara 4.
Perbaiki melalui Linux.. Tutorial langkah2 bisa dibaca disini (maaf panjang banget soalnya). dan mungkin membutuhkan pemahaman tentang perintah2 linux.
Link : linux-tip-resurrecting-broken-usb
Cara 5.
Pakai application OnBelay, disini : Powerful solution for Data Backup, Data Recovery & Formatting for Flash Media
---------------------------------
UPDATE LAGI....
Lah...kok tiba2 kapasitas flash disk jadi menngecil...sisanya kemana? ......
Asal bukan kasus penipuan flash disk dari china yang memang sebenarnya berkapasitas kecil tapi disulap seakan berkapasitas besar, cara2 dibawah bisa ditempuh kalau tiba2 flash disk anda mengalami corrupt pada kapasitas.
Disini ada beberapa pilihan free program:
Smart Data Recovery: http://tiny*url.com/2kcsmm
SoftPerfect File Recovery: http://tiny*url.com/jcacz
ADRC Data Recovery Software Tools: http://tiny*url.com/ppdn9
Dibawah ini ada beberapa program extensive shareware yang mempunyai free trial versions:
Pen Drive Data Doctor Recovery: http://tiny*url.com/2yak98
BadCopy Pro: http://tiny*url.com/ynsv8n
Key Drive Recovery Tool: http://tiny*url.com/2s6x24
Data Recovery 4 Pen Drive: http://tiny*url.com/39t2vx
-----------------------------------------
Update 12 Jan 2009
Driver USB2.0 untuk Windows98
Windows 98 tidak mempunyai driver untuk removable drives seperti flash disk atau external HDD. Kalau di waktu dulu beberapa vendor flash disk masih menyertakan driver untuk produk mereka, tapi di masa sekarang hampir tidak ada yang menyediakan driver ini. Dibawah ini disediakan satu driver yang kompatible untuk semua external drives.
Sebelumnya cek dulu, versi dari windows 98 :
- Klik kanan My Computer dan pilih Properties
- Di halaman System Properties page, kilik General tab
- Di Under the System heading, look for the version number (see right)
Version 4.10.1998 adalah the original/first edition Windows 98 (98FE)
Version 4.10.2222 adalah Windows 98 Second Edition (98SE)
Download program ini :
- Windows98 FE : nusb320-Eng-98FE.exe
- Windows98 SE : nusb33e.exe
Cara instalasi untuk Windows 98SE :
Download file exe file ke desktop
Hapus semua driver untuk USB flash drives di Device Manager
Hapus semua driver USB 2.0 controllers
Hapus semua unknown devices dari Device Manager
Jalankan file exe yg kita sudah download, ikuti perintah, rebootsetelah instalasi
Ketika komputer sudah di boot lagi, akan mendeteksi USB 2.0 controllers baru, dimana kita mungkin harus reboot lagi.
Selesai.
Sumber : di sini
----------------------------------------------------------------
Update 28/01/2009
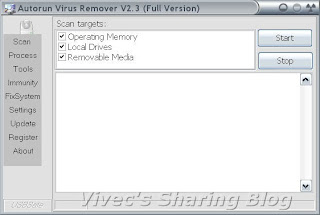
USB Autorun Virus Remover
Autorun Virus Remover menyediakan perlindungan terhadap malicious programs yang mencoba menyerang melalui USB drive. Saat USB device dimasukkan ke komputermu, Autorun Virus Remover akan secara otomatis men-scan, mem-block dan menghapus autorun virus, trojans, dan code yg membahayakan. Juga,akan mendeteksidan menhapus virus USB seperti virus autorun.inf di komputermu.
Sekarang kamu akan lebih terjamin akan kekebalan terhadap pen drive nakal, dimana menjadi sumber terbesar akan virus/trojan horses/worms.
Download Link : http://www.mediafire.com/?jdg0z0mhyzw
Sumber : di sini
---------------------------------------------------------------
Update 29-01-2009
eBoostr™ is an alternative solution to Vista’s ReadyBoost and SuperFetch technologies now available on Windows XP
It speeds up your PC and improves application responsiveness by using flash memory and free RAM as an extra layer of performance-boosting cache for your PC. Use up to four inexpensive flash devices to speed up your system. Add more speed to your PC without any hardware upgrade!
Download link dari bro Vivec : di sini ato di sini juga
Trims..bro Vivec...
Sumber : di sini
Cara Men-Disable Autorun CD dan Removable Disk
Removable disk menjadi media tempat menyebarkan virus setelah flooppy disk tidak populer lagi. Virus virus lokal memanfaatkan flashdisk dan memory card untuk menyebar dan menginfeksi komputer karena removable disk merupakan media yang populer digunakan untuk menyimpan dan pindah data.
Berhati-hatilah menggunakan flashdisk apalagi flashdisk yang tidak jelas asal usulnya sebaiknya sebelum di akses di scan dulu dengan menggunakan antivirus yang uptodate. Jika antivirus tidak memungkinkan untuk di update selalu apalagi tidak mempunyai koneksi internet tentu tidak bisa mengupdatenya.
Untuk itu bisa dengan jalan mendisable autorun CD dan Flashdisk. Virus bekerja dengan mengcopykan dirinya ke dalam flashdisk dan membuat attribute hidden sehingga tersembunyi. Untuk mengakses file virus ini dengan cara membuat subroutin pada flashdisk tersebut dengan memanfaatkan fasilitas file autorun.inf hampir sama fungsinya dengan autoexec.bat pada harddisk.
Disaat flashdisk dipasangkan di USB, system akan mencari file autorun.inf ini, jika file ditemukan system akan secara otomatis menjalankan daftar file yang terdapat pada file autorun tersebut. Autorun ini bisa kita non aktifkan dengan cara mengubah nilai yang terdapat pada registry. Caranya sebebagai berikut:
WINDOWS 95/98/ME
1. Access the System Properties Dialog. Using Control Panel: My Computer: Properties or Explorer: My Computer: Properties.
2. Select the Device Manager tab.
3. Select the CD-ROM folder.
4. Select the entry for your CD-ROM drive.
5. Select Properties.
6. Select the Settings tab.
7. Turn on or off the Auto insert notification option.
8. Select OK.
9. Select OK
WINDOWS NT/2000
1. Start RegEdit (regedt32.exe).
2. Go to HKEY_LOCAL_MACHINE/System/CurrentControlSet/Services/Cdrom.
3. Edit the Autorun value to ‘1′ to enable autorn, and ‘0′ to disable autorun.
4. Close RegEdit
WINDOWS XP
1. Open Windows Explorer by pressing the Windows + “e” key.
2. Right-click the desired CD-ROM and select Properties from the menu.
3. Select the AutoPlay tab.
4. Select each item from the pulldown list and for the Action to perform, select “Take no action” to disable autorun, or pick the apporpriate action to take if enabling autorun.
5. Select OK.
REMOVABLE MEDIA (FLASHDISK ETC)
Autorun can be enabled or disabled for all Removable media types, such as a floppy or Zip disk. Windows systems are configured to enable CD Notification, other removable media are by default disabled.
The System Properties User interface only exposes the CD Enable or Disable selection. The setting reflected in this dialog makes an entry in the System Registry. It is in this same location that other media types are configured.
Notes:
1. Modifiying the Registry is not for the inexperienced user. Anyone will tell you, be VERY careful.
2. The modifications made in this case use Hex not Decimal numbers. If you are unfamiliar with the Registry or the characteristics of base numbering and Hex, studying these topics prior to making these modifications is advisable.
To Modify these Registry Settings, Use Regedit and navigate to the following Key:
HKEY_CURRENT_USER
Software
Microsoft
Windows
CurrentVersion
Policies
Explorer
“NoDriveTypeAutoRun”
The default value for the setting is 95. Change the first byte to 91. Restart the computer to make the new setting take effect. You may have to right-click on the floppy and choose AutoPlay from the menu to see the AutoPlay behavior.
Sumber : di sini
Mempartisi Flash Disk
Ingin mempunyai 2 flash disk tapi ga kesampean ??? Satu - satunya solusi adalah dengan cara Partisi, tapi flashdisk dipartisi, memang bisa ? Setau kita selama ini kan hanya Hardisk yang dapat dipartisi, ya...Sekarang saatnya merubah tanggapan itu....Beginilah caranya..
Pertama-tama siapkan terlebih dahulu alatnya...
1. Partition Magic
2. HP Key Boot Utility
3. Data Pentingnya
Pertama download terlebh dahulu semua data - datanya
Extract FD partition.zip terlebih dahulu....Setelah itu masuk ke dalam registry caranya, seperti biasa : Start >> Run ketik regedit kalau sudah terbuka jendela registrynya masuk ke dalam key berikut :
HKEY_LOCAL_MACHINE\system\controlset001\Enum\UsbSt or
Ya, pada key tersebut akan banyak nama - nama product flashdisk yang pernah masuk ke komputer anda, untuk mengetahuinya sama atau tidak dengan flashdisk anda ada baiknya kita melakukan ricek, caranya :
Klik kanan icon usb di system tray alias pojok kiri bawah pilih Sadely remove Hardware, Kemudian pilih USb yang mau anda belah dan sekarang Klik 2x pada icon tersebut, sesuaikan pada Keyname di registry tadi (HKEY_LOCAL_MACHINE\system\controlset001\Enum\UsbS tor)
Copy KeyName pada registry tersebut (HKEY_LOCAL_MACHINE\system\controlset001\Enum\UsbS tor) misal: Disk&Ven_Kingston&Prod_DataTraveler_2.0&Rev_PMAP
Ya, apabila sudah benar seperti diatas, sekarang buka file cfadisk.inf kemudian tekan Ctrl + H, dan ketikkan Dan Replace Namenya adalah keyname pada registry tadi, yupz sekarang tekan Replace All. Setelah itu masuk ke my computer >> [klik kanan pada FD yang mau dipartisi] pilih; Properties >> Pilih Hardware dan pilih FD yang mau anda belah =p dan klik tombol Properties || Masuk ke tab Driver || Setelah itu pilih Update Driver ||, Kalo sudah, ada di Hardware Update Wizrd, pilih Install From a List [ yang bawah ] Next || Pilih Don't Search I will ...[yang bawah] || Next lagi || Klik Have Disk || Browse dimana cfadisk.inf diletakkan,sekarang pilih next || Next, sampai Finish...
Jika benar maka Flashdisk anda akan berganti status menjadi Hardisk, Sekarang Install semua Software yang anda Download tadi, Sekarang gunakan HP Key Boot Utility untuk memperbaiki bad sectornya untuk penggunaan key boot utility sampai Proses pembelahan flashdisk anda dapat melihat tutorial saya di sini ya, ini memang tutorial saya untuk di dua tempat untuk itu saya izin terlebih dahulu =p yah....
Demikianlah tutorialnya, semgoa anda jadi lebih bisa berhemat =p untuk tidak membeli 2 FlashDisk
NB : Hati - hati terhadap DeepFreeze Ingat status FD anda sekarang adalah Hardisk, apabila anda ingin mengembalikannya menjadi status FD anda cukup pdate Driver lagi, tetapi Pilih yang Install Software Application [Recomended]
Sumber : di sini
nambahin yh bos buat matiin autorun XP..
1.RUN
2.GPEDIT.MSC
3a.Computer Configuration\Administrative Templates\System
3b.User Configuration\Administrative Templates\System
4.double click Turn off Autoplay ganti enabled All Drives
5.restart
Memperbaiki Flash Disk Yang Rusak
Author: Agus Waluyo
Awalnya saya bingung juga kenapa Flash Disk Kingstoon saya yang 1 Gb mendadak rusak. Kalau ditancapkan terdeteksi tetapi kalau di akses selalu ada tulisan Please Insert Disk. Sedangkan jika dilihat propertiesnya terbaca 0 kb. Flashdisk yang saya beli setahun lalu seharga Rp 180.000,00 itu (mungkin kalau sekarang sudah bisa dapat dua ya
) nampaknya akan saya bongkar dan akan saya gunakan untuk pembelajaran anak-anak.Hanya sekedar iseng saja, karena saya juga tidak yakin kalau flashdisk itu bisa diperbaiki aku masukkan kata kunci “memperbaiki flashdisk rusak”. Hanya dalam hitungan detik saya dihubungkan dengan sistus Mas TIkno, dengan setengah hati saya baca tutorialnya. Setelah download file sebesar 45 Mb dan mengikuti step-step yang ada, wah surprise ternyata flash disk saya bisa lagi, sayapun tidak menyangka.
Untuk meperbaikinya silahkan ikuti step-step berikut ini.
1. Download HP Drive Boot Utility sebesar 45 Mb. Freeware. Software ini mendukung untuk Flash Disk yang bukan keluaran HP.
2. Install software tersebut
3. Tancapkan flashdisk yang bermasalah ke dalam komputer.
4. Jalankan software dan pilihlah drive tempat flash disk anda.
5. Pilih Creae New or Replace Existing Configuration
Sekarang coba cek flash disk anda. Wah sekarang punya flashdisk lagi dong
1. Download HP Drive Boot Utility sebesar 45 Mb. Freeware. Software ini mendukung untuk Flash Disk yang bukan keluaran HP.
2. Install software tersebut
3. Tancapkan flashdisk yang bermasalah ke dalam komputer.
4. Jalankan software dan pilihlah drive tempat flash disk anda.
5. Pilih Create New or Replace Existing Configuration
Sekarang selamat mencoba semoga sukses..
>>>Download softwarenya disini gan<<<
Wednesday 3 March 2010
Link Biology
How Biology Make U Enjoy
http://endahsulistyowati.wordpress.com/
http://endahsulistyowaty.blogspot.com/?zx=2f74c12eaa988f66
http://www.teach-nology.com/ideas/ <==with nice forum!
http://www.teach-nology.com/ideas/bullying/
http://teachone.tripod.com/biology/
http://teachone.tripod.com/teaching/index.html <==nice!
http://www.instructorweb.com/science.asp
http://www.instructorweb.com/resources/biology.asp
http://www.biologycorner.com/lesson-plans/ecology/
http://www.time.com/time/magazine/article/0,9171,871699,00.html
http://sciencespot.net/Pages/classbio.html <==nice!
http://www.biologycorner.com/amazing-science-sites/
Foto2 Venus
http://www.forumkami.com/forum/cafe/19150-tanaman-carnivora-memangsa-binatang.html
Tulisan Blog tth Nephentes di Batam:
http://octopusdive.org/nephentes-–-tanaman-carnivora-ternyata-mayoritas-di-indonesia/
Ttg LKS Bio SMP
http://the-manuals.com/biologi-kelas-7-manual/
http://www.pdfqueen.com/pdf/'r/'rpp-ipa-biologi-smp-kelas-vii-semester-2/
Subscribe to:
Posts (Atom)